

To estimate the area for sod installation, sketch the lawn, divide it into simple shapes, measure each shape and subtract spaces that will not receive turf. Keep all measurements in the same unit. That gives us a useful starting area for a Hamilton lawn project, but it is not automatically the final quantity of sod to order.
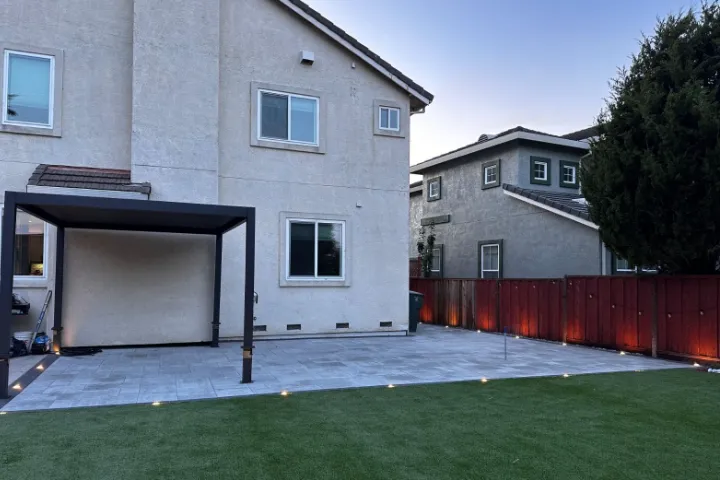
At Monarch Landscaping, we find it helpful when a homeowner can show where the proposed lawn begins and ends. A clear drawing often tells us more than a single square-foot figure. It reveals separate lawn sections, narrow access routes, curved beds and areas whose boundaries are still being decided. Here is a practical way to gather that information without pretending a rough measurement replaces a site assessment.
Decide what the new lawn will actually cover
Before picking up a tape, decide which surfaces are included. Are you replacing the front lawn, the rear lawn or both? Will an existing garden bed remain? Is a new walkway already planned? Measuring the current grass makes little sense if the finished layout will be different.
Mark the proposed boundaries on a simple sketch. Include the house, paving, beds, trees and any separate strips of turf. You do not need an architectural drawing. Labels such as “front lawn,” “side strip” and “back lawn beside patio” are enough to keep the measurements connected to the correct area.
Leave unresolved sections clearly marked. If you are considering widening a bed, show both possibilities instead of silently choosing one. We can then discuss how the alternatives change the lawn area and the installation scope. This avoids turning an uncertain layout into an apparently exact material quantity.
Measure rectangles first
For a rectangular lawn section, multiply length by width. A space measuring 20 feet by 30 feet has an area of 600 square feet. Write the dimensions beside the shape and put the calculated area inside it, so the result can be checked later.
Keep the measuring line straight and measure to the intended turf boundary. A fence is not always the edge of the new grass if a planting strip will remain beside it. Similarly, the outside of a patio border may be the correct boundary rather than the centre of a garden edging block.
Use one system of units
Feet multiplied by feet produces square feet; metres multiplied by metres produces square metres. Avoid combining a length in metres with a width in feet. If someone else helps with the measurements, agree on the unit first and write it on the sketch.
For reference, one square metre is approximately 10.764 square feet. Convert the completed area when needed rather than converting some dimensions and leaving others unchanged. A consistent method makes mistakes easier to notice and keeps the estimate understandable for everyone involved.
Break an irregular lawn into smaller pieces
An L-shaped lawn can often be split into two rectangles. Measure each rectangle separately and add the areas, making sure the pieces do not overlap. For a triangular section with a straight base and a perpendicular height, multiply base by height and divide by two.
Suppose a lawn has a 600-square-foot rectangle and a triangular section with a 10-foot base and a 12-foot perpendicular height. The triangle adds 60 square feet, giving a combined gross area of 660 square feet before exclusions. This is a measurement example, not an estimate of what any particular Hamilton property requires.
For curved boundaries, a preliminary approximation may be enough to begin the conversation. Use several smaller sections and identify the curve as approximate. We would rather see an honest estimate with a clear sketch than a very precise-looking number based on an uncertain edge.
Record narrow strips separately
Small strips can have a modest area but require more cutting and fitting than a broad rectangle. Measure their length and width, and show where they connect to the main lawn. A narrow section behind a shed can be easy to overlook when measuring from a photograph.
Also note places that taper. If a strip gets wider toward one end, do not assume the narrowest width applies throughout. Several measurements along its length will give a clearer picture and help the installer decide how to verify the final area.
Subtract beds and other exclusions
After adding the lawn sections, subtract areas that will remain outside the sod installation. In the example above, a 4-foot-by-8-foot bed removes 32 square feet from the 660-square-foot gross area. The preliminary net turf area is therefore 628 square feet.
Show the bed on the drawing even after subtracting it. We need to know whether it sits in a corner or forms an island in the middle of the lawn. Those layouts can have the same net area but different cutting requirements.
Do not double-subtract an exclusion. If you measured two rectangles that already stop at the garden bed, its area is not part of either rectangle. This is why the sketch matters: it makes the calculation visible rather than leaving a series of unexplained numbers on a phone.
Separate lawn area from the final sod order
The measured lawn area and the material order are related but different. Cutting around curves, irregular boundaries and obstacles can create offcuts. Roll dimensions and the layout also influence how much material is needed. A contractor may include an allowance after checking the site.
We do not recommend applying one universal waste percentage to every yard. A simple rectangle and a lawn with many small curves can use material differently. Ask who is responsible for the final measurement and order, and whether the quoted quantity includes the expected cutting allowance.
Our sod installation service involves more than covering a measured surface. Existing vegetation, soil work and finishing details still need assessment. A square-foot figure helps us start, but it does not describe the whole project.
Record access and ground conditions beside the measurements
Measure gate openings and photograph the route from the street to the lawn. Note steps, tight corners and any surface that must be protected. These dimensions are not added to the turf area, but they can influence how materials and removed turf move through the property.
Also mark visible low spots, exposed roots and sections that remain wet. Do not try to turn those observations into a drainage design. Simply showing where the issues occur helps us understand what should be inspected before lawn replacement.
For a sloped section, identify that the ground is sloped rather than assuming a flat map measurement describes every installation requirement. We can decide how to verify the surface and plan the work. The objective is useful information, not a survey prepared without the necessary equipment.
Use photos to make the sketch easier to read
Take an overview from each end of the proposed lawn and a closer photo of any awkward boundary. If possible, label the photos with the same section names used on the sketch. Include a familiar fixed feature, such as the patio edge, so we can orient the view.
Aerial images can help locate sections, but they may be outdated or hide boundaries under trees. Check them against the actual property. The new lawn might be smaller than the visible green area if a garden has expanded, or larger if a bed is being removed.
When the drawing is ready, keep the original dimensions as well as the total. That lets us resolve a discrepancy without asking you to start again. If your plans change, revise the affected section and date the sketch rather than relying on a total saved from an earlier layout.